Introduction:
Today, I’m excited to guide you through the process of adding a dynamic progress bar to your Storyline course player. This handy feature will keep your learners engaged and informed about their progress without taking up valuable slide space.
Before we begin, I want to acknowledge Jamie from the Littleman Project for inspiring this tutorial. We’ll follow similar steps, but we’ll focus on the JavaScript aspect and include a unique final step.
Step 1: Open Your Storyline Project
Let’s start by opening your Storyline project. Navigate to the “View” tab and select “Slide Master.”
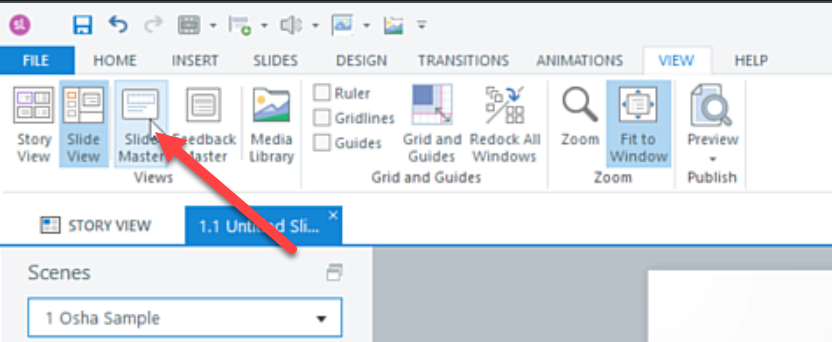
Click on the master slide layout to access the master slide.
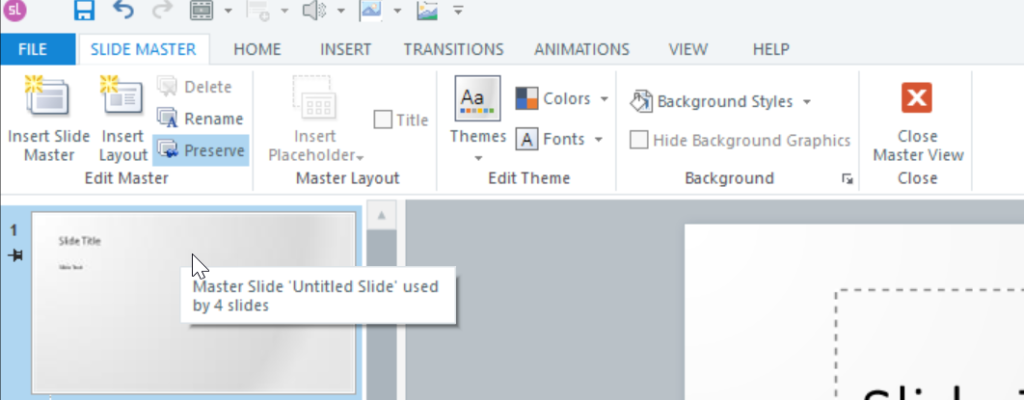
Step 2: Create a Custom Variable
Since JavaScript can’t directly access Storyline’s built-in variables, we need to create a custom variable for it to work with. Here’s how:
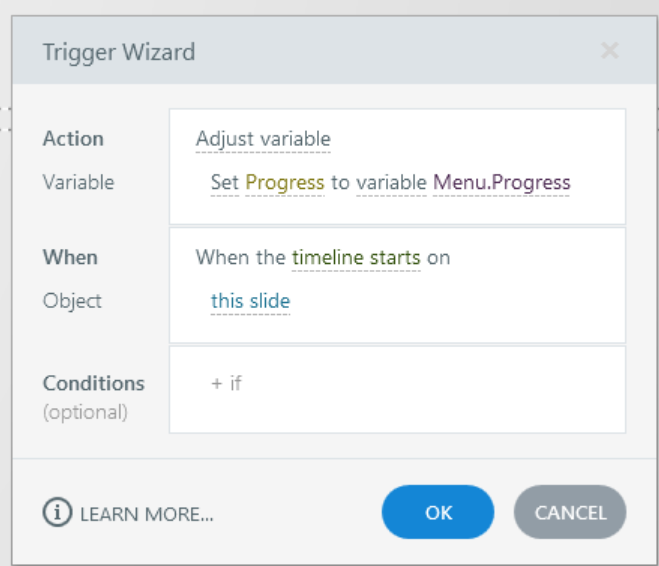
- Under “Action,” choose “Adjust Variable.”
- Create a new variable and name it “progress.”
- Set the “progress” variable to equal the built-in variable that tracks course progress. You can choose between “menu progress” and “project progress.” We’ll explore the differences later in the tutorial. For now, select “menu progress” and leave the trigger activation settings as they are. Click “OK.”
Step 3: Add JavaScript Code
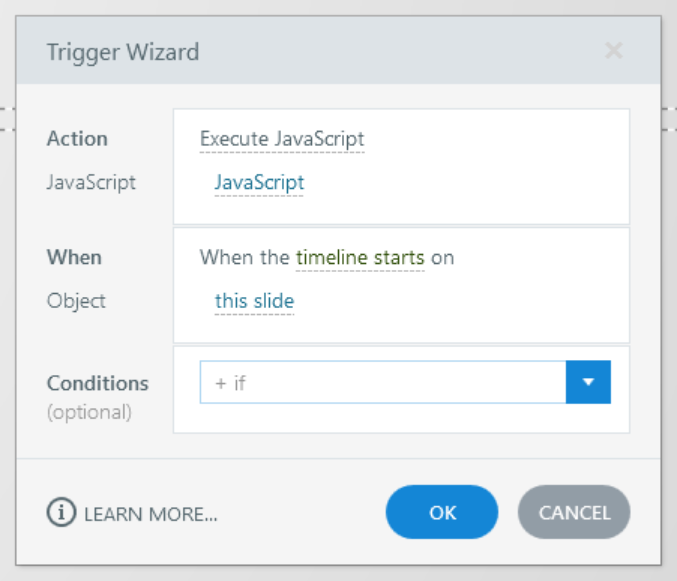
Next, we need to introduce JavaScript to the mix. You can find the necessary code in the link provided in the video description. Copy the code and paste it into the JavaScript field.
/* CHANGE THESE VARIABLES */
const container = document.getElementById("links-right"); // Container for the buttons
const bgColour = "#F6F9FB"; // BACKGROUND COLOUR.
const barColour = "#FCCE4B"; // PROGRESS COLOUR.
const compColour = "#19BB32"; // COMPLETED COLOUR (will not change if empty).
const borderRad = "100px"; // BORDER RADIUS.
const progress = "Progress"; // PROGRESS VARIABLE (Case Sensitive).
/* DO NOT CHANGE BELOW UNLESS INTENDED */
const player = GetPlayer();
let scale = player.GetVar(progress);
let testElement = !!document.getElementById("pBar"); // Test to see if the bar already exists.
if (!testElement) { // If bar doesn't exist
    // Create a container for the Progress Bar
    let progressBarContainer = document.createElement("div");
    progressBarContainer.id = "progressBarContainer";
    progressBarContainer.style.display = "flex";
    progressBarContainer.style.alignItems = "center";
    progressBarContainer.style.justifyContent = "flex-end";
    progressBarContainer.style.flexDirection = "row-reverse";
    progressBarContainer.style.height = "15px";
    progressBarContainer.style.transform = "translate(20px,3px)";

    // Create the background element for the Progress Bar
    let bgBar = document.createElement("div");
    bgBar.id = "bgBar";
    bgBar.style.width = "100%";
    bgBar.style.height = "100%";
    bgBar.style.backgroundColor = bgColour;
    bgBar.style.borderRadius = borderRad;

    // Create the progress element of the Progress Bar
    let pBar = document.createElement("div");
    pBar.id = "pBar";
    pBar.style.width = scale + "%";
    pBar.style.height = "100%";
    pBar.style.backgroundColor = barColour;
    pBar.style.borderRadius = borderRad;
    pBar.style.position = "absolute";

    // Set the max width for the progress bar (e.g., 300px)
    progressBarContainer.style.maxWidth = "20%";

    // Insert the background and progress elements into the container
    progressBarContainer.appendChild(bgBar);
    progressBarContainer.appendChild(pBar);

    // Insert the progressBarContainer into the "links-right" element
    container.appendChild(progressBarContainer);

    // Check and set the display property for the "links-right" element
    const linksRightDisplayStyle = window.getComputedStyle(container).getPropertyValue("display");
    if (linksRightDisplayStyle === "none") {
        container.style.display = "block";
    }
} else { // If it does exist
    document.getElementById('pBar').style.width = scale + "%"; // Update the width
}
if (scale == 100 && compColour) {
    document.getElementById('pBar').style.backgroundColor = compColour;
}
You should have to triggers in your trigger panel.
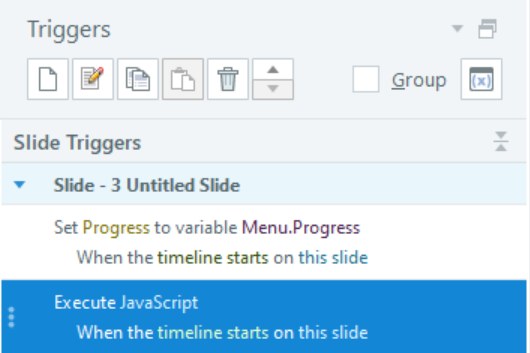
Note: For this exercise, make sure you have buttons on the top right of the course player (i.e. Resources, Glossary)
Step 4: Publish and Witness the Magic
With everything set up, it’s time to publish your project and see the dynamic progress bar in action. You’ll notice that it dynamically tracks your course’s progress, and you won’t need any additional triggers or variables.

How It Works:
To help you understand the mechanics, here’s a breakdown:
- When Storyline generates the HTML file, it creates a div element called “links-right” at the top bar.
- JavaScript retrieves the “progress” variable and adds a new element inside the “links-right” div. The size of this new element adjusts based on the “progress” variable.
- Essentially, you’re adding a new element to the top bar. Remember to have a navigation element at the top, either the title or buttons on the right side.
Step 5: Understanding “menu.progress” vs. “project.progress”
Let’s explore the difference between these two variables:
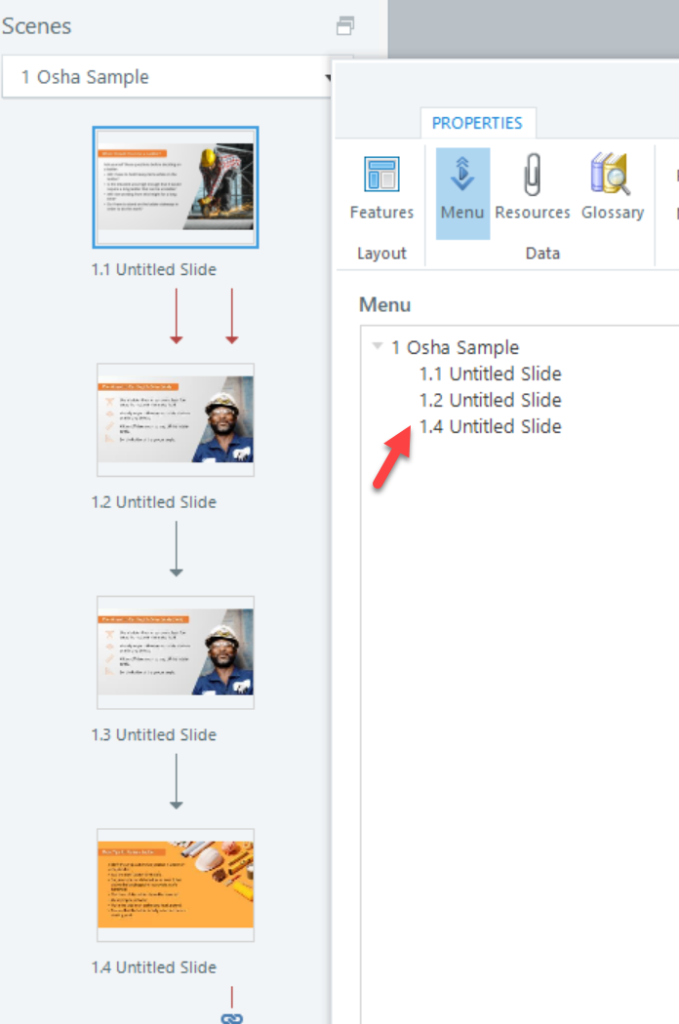
- Duplicate a slide and remove it from the player menu.
- Publish it again and observe that the progress bar doesn’t advance. This is because the “menu.progress” variable only tracks slides on the menu. It’s perfect for projects with optional slides.
- On the other hand, the “project.progress” variable tracks all slides in your project, making it ideal for projects where all slides are mandatory.
Step 6: Dealing with a Quirk
You might encounter a quirk if your course lacks buttons on the right side, like glossary or notes. Here’s a quick fix:
- Remove the navigation buttons on the right side from the course player and publish it.
- Notice how the progress bar disappears. This occurs because Storyline’s published file has JavaScript that hides the element when there are no buttons on the right side.
Workarounds:
- Method 1: Add another JavaScript trigger to the master layout using the provided code. This will keep the “links-right” display element turned on, reducing flickering.
const player = GetPlayer();
const container = document.getElementById("links-right");

// Check and set the display property for the "links-right" element
if (container) {
    const linksRightDisplayStyle = window.getComputedStyle(container).getPropertyValue("display");
    if (linksRightDisplayStyle === "none") {
        container.style.display = "block";
    }
}
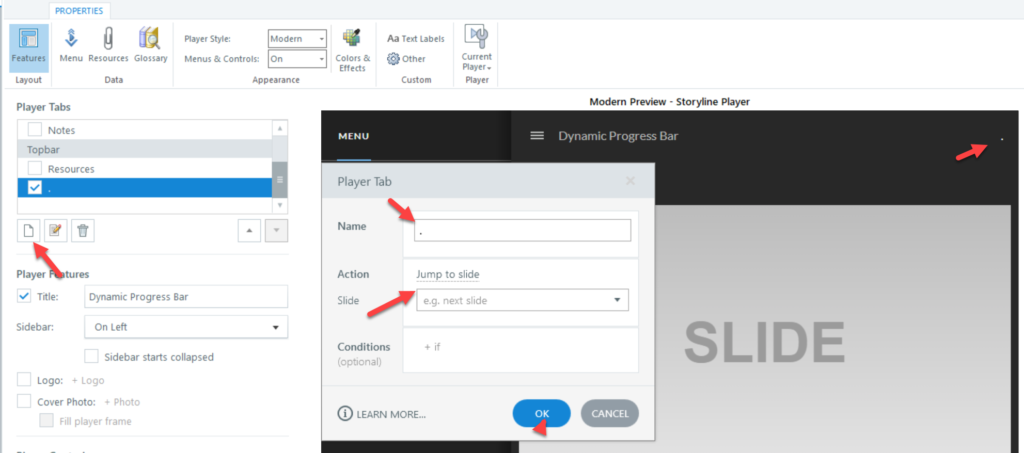
- Method 2: If your course doesn’t need a button on the top right, add a period on the player tab that requires no action. Unfortunately, Storyline won’t accept just a space. This eliminates the flickering issue.
Conclusion:
That’s a wrap for this tutorial! You’ve successfully added a dynamic progress bar to your Storyline course player. If you have any questions or need further guidance, please don’t hesitate to ask in the comments below or visit my website.


