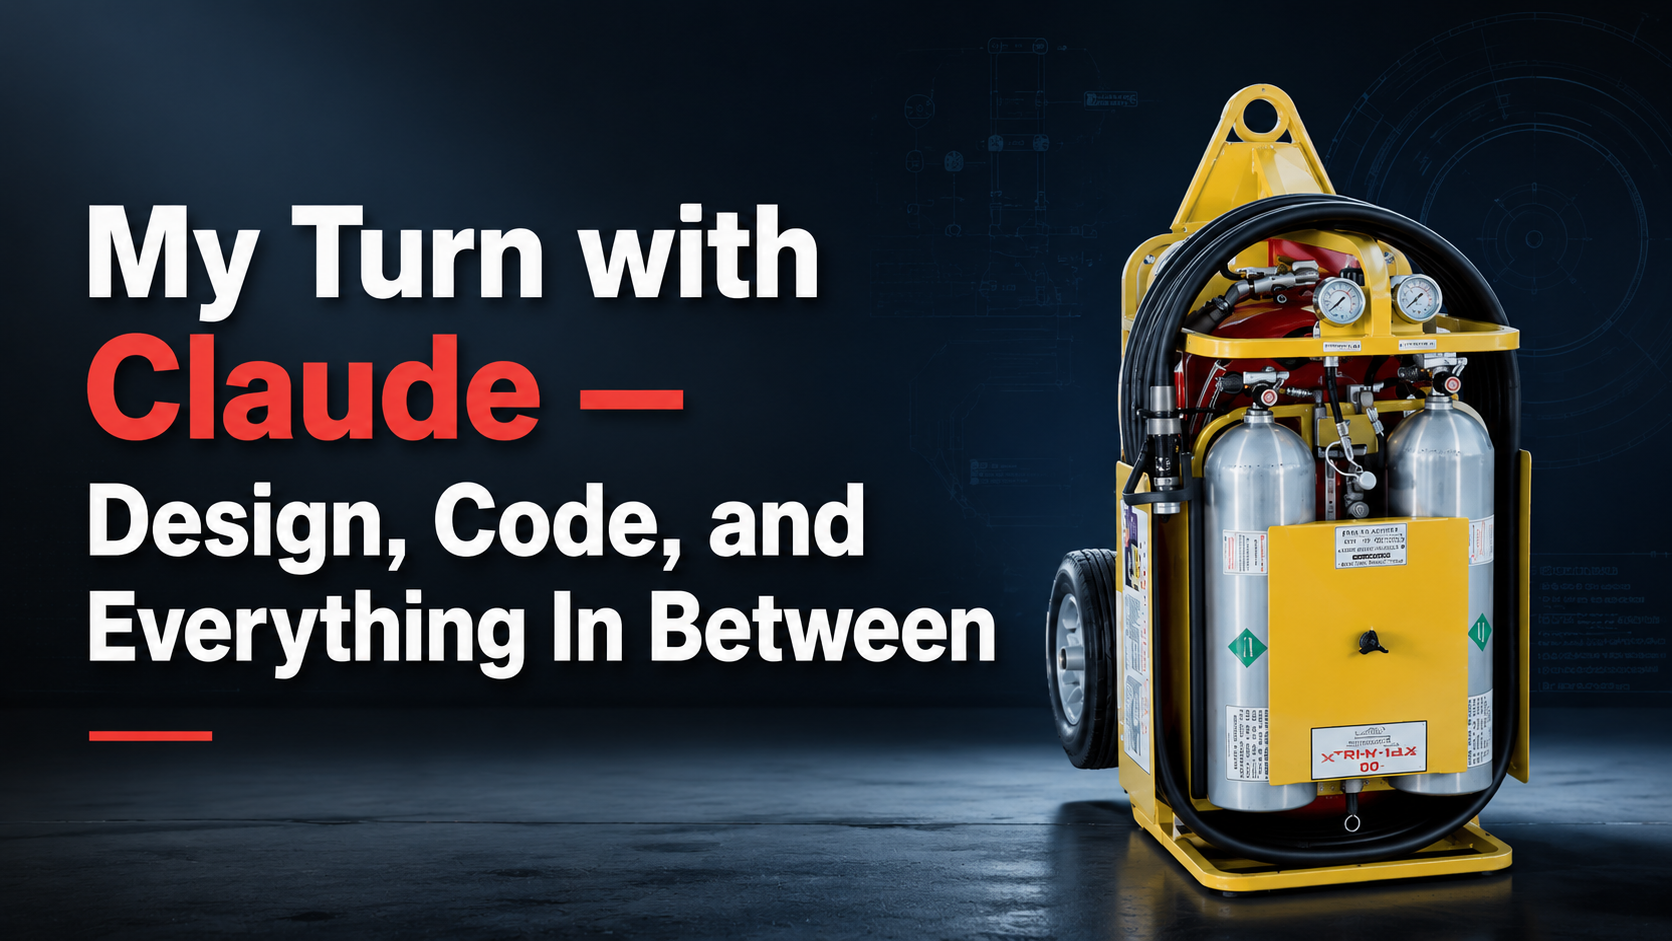
I decided to give Claude Design a try to see what it could create, and to see what I could learn from working with it — though this ended up testing three of Claude’s tools, not just Design. I didn’t just want to feed it content and let it create something on its own; I had something very specific in mind. I’ve broken this long post into sections so you only need to read what you’d like to read. I want to say up front that I’m not anti-AI or pro-AI. I feel like it’s a great tool, but it isn’t ready to replace the tools we currently use in our industry.
Backstory
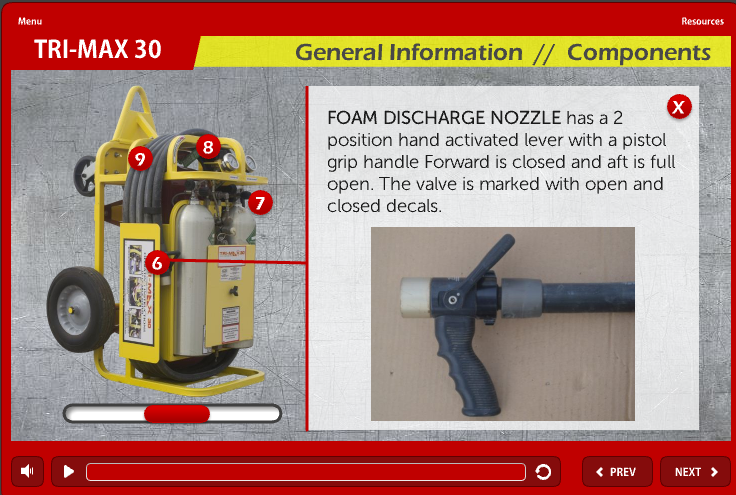
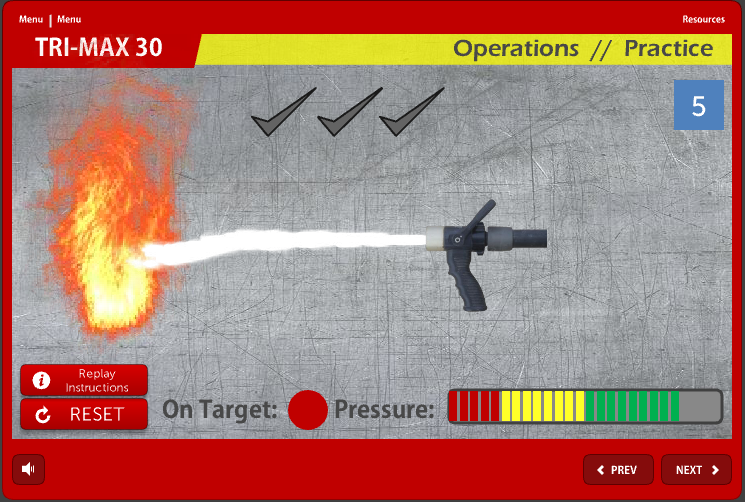
A while back (over 10 years ago), I created some training for a certification program I was charged with developing. The training involved a piece of firefighting equipment. For certification purposes, all we needed was an SOP and a checklist, but being ambitious, I could see potential for some interactive training opportunities. I used Storyline (I don’t remember if it was 1 or 2) on my own time and created a version of the training I had envisioned, partly to test my own skills. One of the interactions used a slider to turn the equipment around and view it at different angles. Another had a practice segment where you had to drag the hose and spray some animated fire correctly to complete the course. It was fairly impressive for the time, even if I do say so myself. Ever since then, any time a new application or technology came along that let me create a better version of what I envisioned, I tried to recreate it.
Purpose
As I said, I didn’t want Claude to design something for me — I wanted to direct exactly what it built. The experiment was just going to be a test of what I could create, so I wasn’t focused on the training content itself — only on what I could make Claude build for me. I wanted it to have three interactive activities: a 3D model you can interact with, an animated step-by-step guide, and a practical exercise where the user simulates using the equipment. With this goal in mind, I set out on my workflow.
Workflow
Since I only had the lowest-tier Claude subscription for this experiment, I wanted to be efficient with my token usage. My workflow was to use Claude AI for initial planning and storyboarding, then Claude Code for development, then Claude Design for polishing.
Claude AI — I started by just chatting with Claude AI. I told it what I wanted to do and asked for a plan. I also told it what I could provide — audio narration and a 3D model to use with Three.js (this part is important). We discussed a couple of ways to achieve what I had in mind, and I asked for a prompt that laid out everything we’d discussed, which I used in a new chat to avoid contaminating the current one. This way I could go back and ask questions later without worrying that I’d confuse it.
➡️A portion of the project instructions I added for Claude AI to follow to develop the course.
# TRI-MAX 30-CAF Interactive Training Module — Master Development Prompt (v2)
---
## Project Overview
Build a five-phase interactive 3D training module for the TRI-MAX 30-CAF Cold CAF Fire Suppression System. The module uses a GLTF/GLB 3D model rendered in Three.js (r128) inside a standalone HTML file. No frameworks. No build tools. Single deployable HTML file + GLB asset + audio/caption files.
---
## Workflow Plan
```
Step 1 — Claude AI      Extract manual content, write narration scripts,
                        complete storyboard frames, generate VTT captions
Step 2 — Claude Code    Build functional HTML prototype, wire all logic,
                        animations, audio, captions, raycasting
Step 3 — Claude AI      Review, debug guidance, iteration prompts
Step 4 — Claude Design  CSS/UI polish only — no JS logic changes
```
---
## Five-Phase Structure
### Phase 1 — Product Introduction (Text + Audio + Captions)
- No 3D model interaction
- Slides: player content area shows light gradient background + heading + body text
- Each slide has: heading, body text, narration script, VTT file
- Advance: Manual (Next button) OR auto on audio end (set per slide in storyboard)
- Control bar visible: progress indicator shows slide N of N
- Sidebar: hidden
- Transition to Phase 2: "Explore the Unit" button on final slide
### Phase 2 — Component Explorer (Interactive Hotspots)
- Uses `TriMax_V7_No_Anim.glb`
- Free orbit enabled — user can rotate, zoom, pan
- All 6 hotspot markers visible and active from the start
- User clicks a hotspot marker or sidebar component button:
  - Camera flies to the corresponding `Cam_Pos_` Blender camera
  - Tooltip popup opens with component name, description, and manual-sourced info
  - SVG dashed connector line drawn from marker to tooltip
  - Hotspot audio clip plays
  - Sidebar highlights the selected component
- All 6 hotspots must be visited to unlock Phase 3
- Visited hotspots: marker turns green with checkmark, sidebar item shows ✓
- Progress indicator in control bar: "Components explored: N of 6"
- "Proceed to Training" button appears when all 6 visited
- Sidebar tab: Components only (no Animations or Specs tabs in this phase)
### Phase 3 — Guided Walkthrough (Animated + Audio)
- Uses `TriMax_V7.glb`
- Linear, camera-controlled, no free orbit
- Each step: camera flies to authored Blender position → animation plays →
  instruction panel shows manual-sourced text → narration audio + captions
  play → user clicks "Next"
- Hotspot markers visible but non-interactive
- Progress indicator: Step N of N
- Sidebar: Components tab active, highlights current component
### Phase 4 — User Practice
- Uses `TriMax_V7.glb`
- Same steps as Phase 3 but user must trigger each action
- Free orbit re-enabled
- Checklist panel replaces instruction panel
- Each item activates when user clicks correct hotspot or triggers correct
  animation in correct sequence
- Wrong order: gentle audio cue + error message, no penalty
- Hotspot audio active
- All steps complete → "Proceed to Exercise" button + completion audio
### Phase 5 — Spray Exercise
- Uses `TriMax_V7.glb`
- Play `Pose_SprayReady`, clamp at last frame
- Camera flies to `Cam_Nozzle`
- `exercise_intro.mp3` plays
- User drags mouse to aim nozzle (drives bone chain rotation)
- Hold LMB to open valve and spray foam particles
- Raycasting from `Nozzle_Tip` each frame:
  - Hits `Fire_Target_Base` → suppression progress fills
  - Misses → `aim_lower.mp3` + "Aim at the base of the fire" feedback (3s cooldown)
- Suppression drains slowly when not hitting base
- 100% suppression → success screen + `success.mp3` + score (time, attempts)
- Retry available
```
I used the prompt to build out a design guideline for the course player and a storyboard for the training course. I had it design the storyboard slide by slide so it was easier to review. Although the training content wasn’t the focus, I wanted to review it to see how accurate it was. Before finishing this phase, I asked it to build a quick prototype of the course player so I could see what it would look like. I asked for some adjustments, and once I was happy with it, I had Claude AI update the design guideline to match.
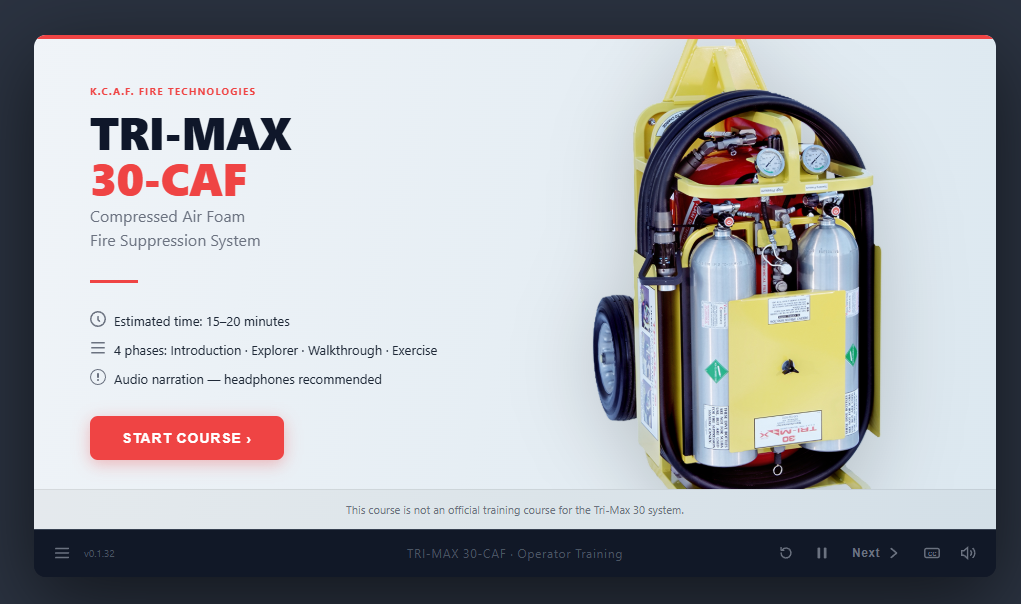
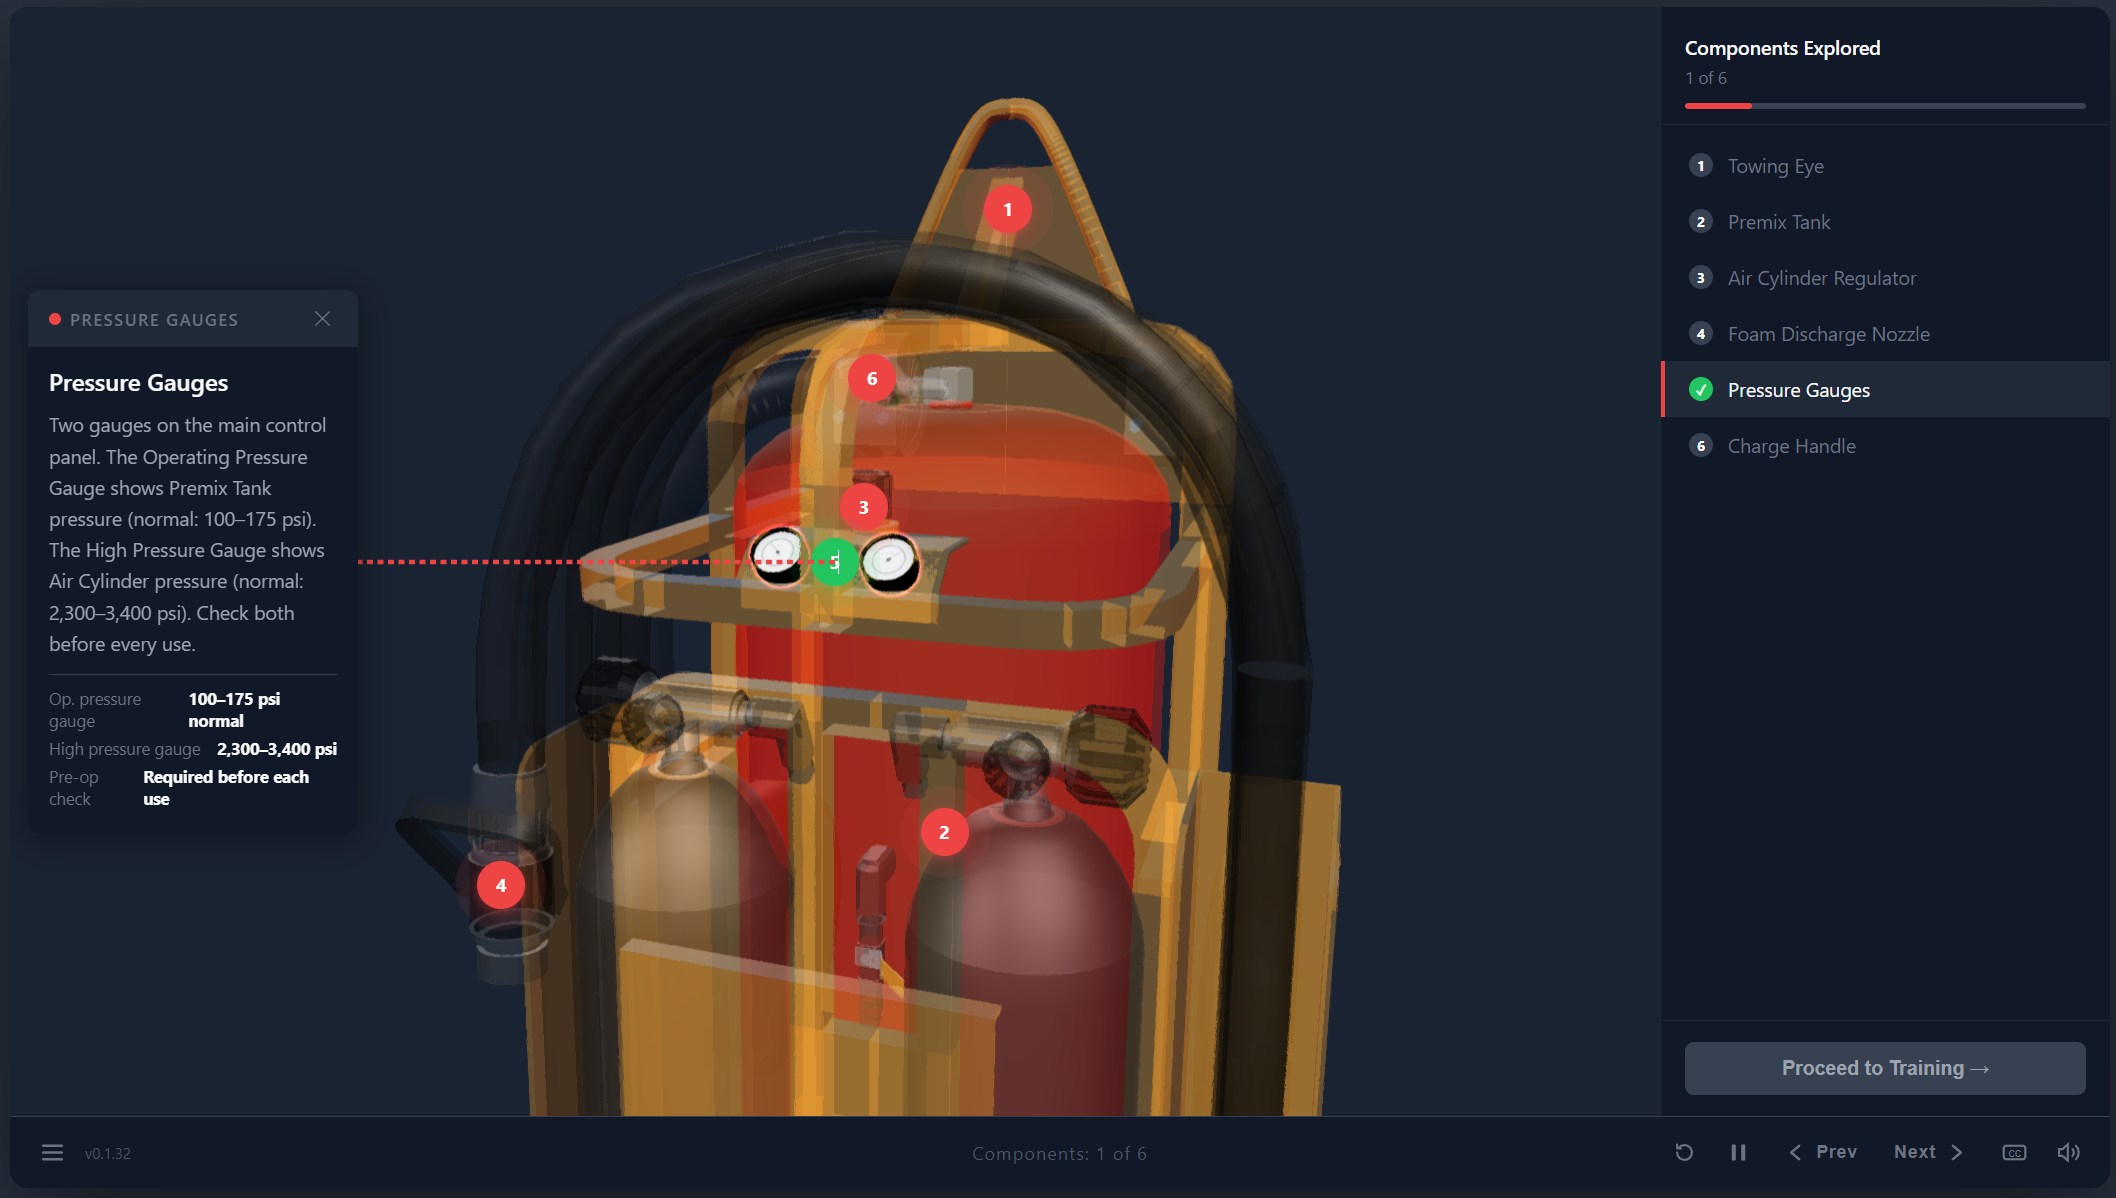
Claude Code — One thing I didn’t mention: when I asked Claude AI to create the design guidelines and storyboard, I specifically had it write them to be used with Claude Code for development. The storyboard and guidelines included specific instructions for the interactions I wanted. Claude AI even provided a prompt to use when I switched over to Claude Code. This made the step very straightforward. Claude Code developed each slide one at a time. I requested some changes for a better experience once I’d had a chance to play around with it. There were some issues with the 3D interactions not initially working correctly, but I knew enough about 3D modeling to guide it in the right direction.
Claude Design (Attempt 1) — This is where things got tricky. My prompt for Claude Design was to leave the JavaScript and code alone and only polish the appearance of the course. Unfortunately, while updating the CSS, Claude Design broke it. None of the interactions or animations worked anymore, and from what it did update, I couldn’t see much of a visual change either. At this point I’d already sunk a fair amount of time into the project, and given the small improvement it made to the appearance, I decided it wasn’t worth pursuing further or trying to fix. Instead, I kept the version Claude Code completed and used that as my final for the first experiment.
I still wanted to give Claude Design a real shot on its own, so I used a simple prompt and saw what it could create by itself:
“Using the attached manual, extract all content relevant to [General Information, Specifications, Components, Normal Operating Instructions] and summarize the key operational steps, safety warnings, and specifications, and create an interactive course to be used for introductory training.”
I attached some documents with basic content, and it began creating a basic course. The final product was very well graphically designed — although there may be some WCAG issues — but without any audio, images, or guided interactions, it was really just a Rise course on steroids. Basically another “vibe-coded” course.
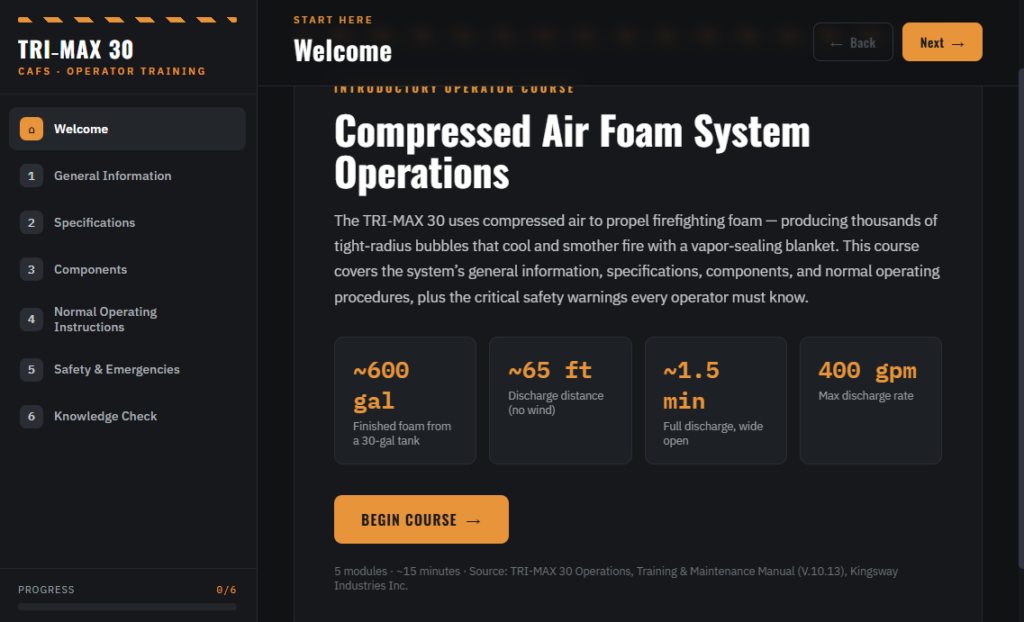
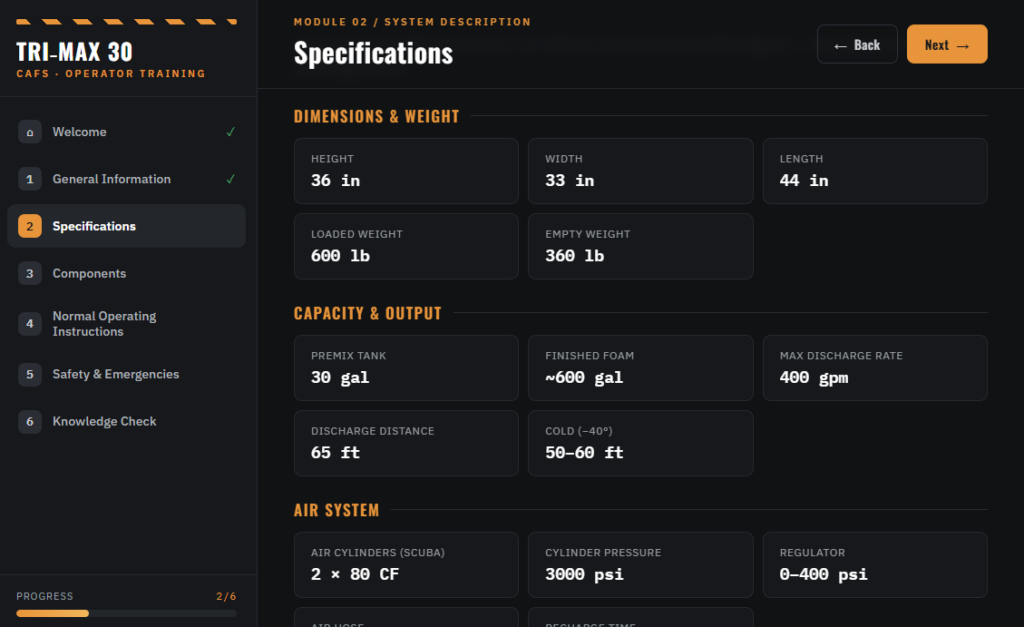
Claude Design (Attempt 2) — I decided to make another attempt with Claude Design alone, this time giving it more specific information about what I wanted and what I could provide: audio, images, and the 3D model. I didn’t include instructions for a practical exercise like the Spray Practice slide from the first course, or an interactive hotspot 3D model. I also wasn’t specific about using Three.js, which made a big difference later on: Claude Design defaulted to Google’s Model Viewer instead. The end result still looked aesthetically better than the Three.js version, but it limited what I could actually do — I couldn’t recreate the same interactions from earlier.
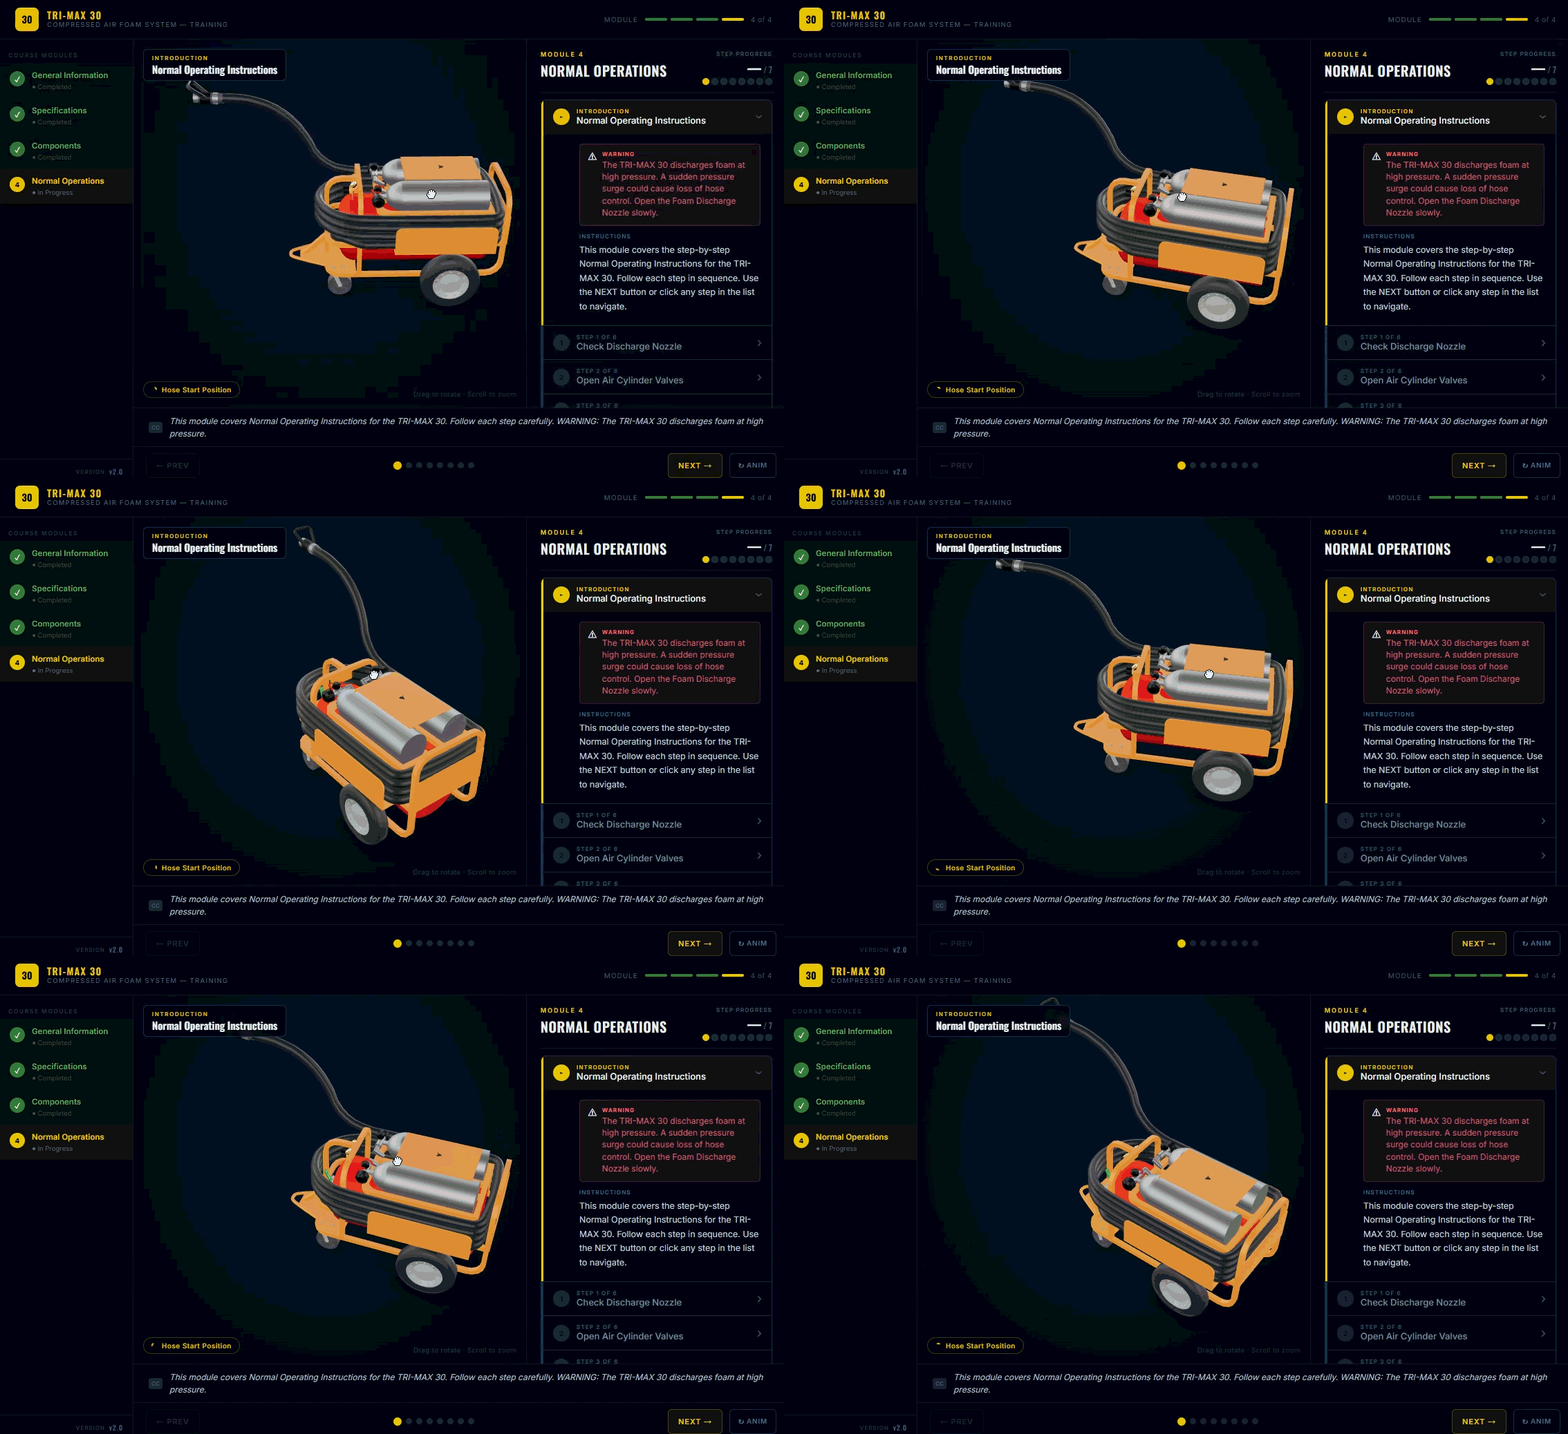
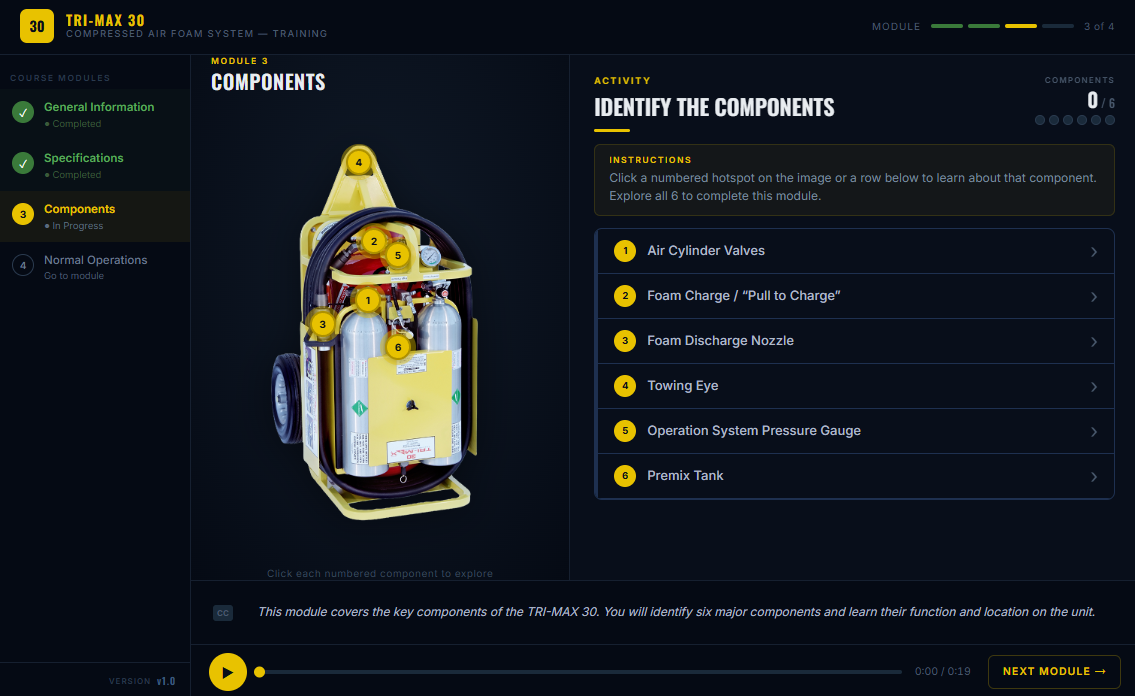
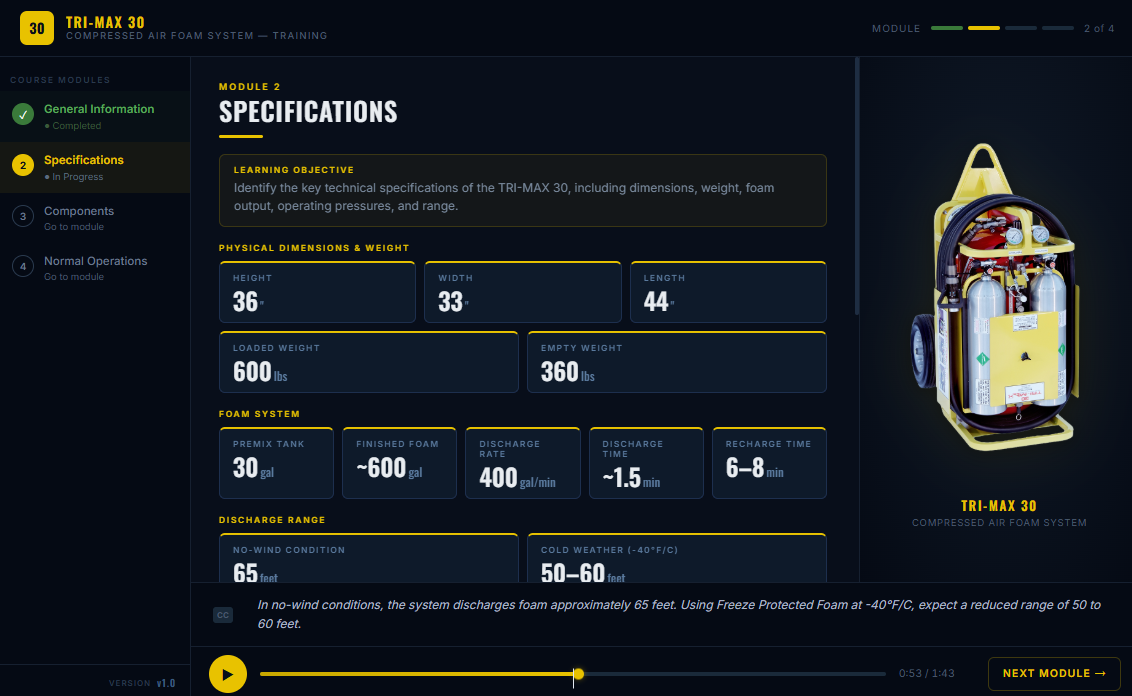
This is one of those “I wish I knew” items — I was really curious whether Design alone could do something better than Claude AI and Claude Code. But I didn’t want to sink any more time into it (and I was almost out of tokens for this attempt), so I continued with the experiment and made a few more adjustments, which turned out to be fairly straightforward.
Conclusion
Of the three projects, I’m happiest with the one built through Claude AI and Claude Code, since it was exactly what I wanted. The project Claude Design created on its own was impressive, and I think with specific instructions similar to what I started with for the first project, it might have surpassed it. As for token usage, the Claude AI + Claude Code workflow didn’t come close to using up my monthly limit, unlike Claude Design alone — though Claude Design took less overall time to reach a finished product. This is one of those “you can have it cheap, or you can have it good” moments.
Overall, the experiment left me feeling a little empty. I’m happy with what I was able to do with Claude, and I learned to communicate with it a bit more effectively, but I don’t think I learned enough for the level of effort I put in. If I’d attempted this on my own — learning Three.js or using Godot to build something similar — it would’ve taken months, but I think I would have come away with a lot more knowledge, the kind that carries over to other projects and could even improve how I direct AI on future ones (the same way my prior 3D modeling knowledge helped me here).
This, I think, is where it’s going to separate instructional designers who let AI build their projects for them from those with a wider breadth of knowledge who can actually direct AI to build effective training.
As I stated before, I’m not anti-AI or pro-AI, but I think it’s important to add AI to your toolset. Each AI model and service is different, and you need to learn what workflow works best for you. I also want to stress how important it is to not stop learning about other tools and technologies. Now that the bar has been raised for the average instructional designer, it’s more important than ever to not be average.
Tips
A few things I picked up — and wish I’d known going in:
- Test your prototype early. Once you have a sound design for a few slides, have the AI build it out so you can test it. Nothing is more frustrating than finishing an entire storyboard, only to find the course player isn’t what you imagined — and then having the AI go back and edit every slide or module. It’s a great way to introduce new bugs.
- Be specific about what you want and what you can provide — videos, audio, narration, animations (if the AI won’t generate them for you). Then ask for an asset list at the end covering the deliverables you’ll be responsible for.
- If you make changes that deviate from your core instructions, storyboards, or references, make sure the AI updates those documents too, if it can. I changed the design of the course shell in a way that deviated from my original instructions, without asking for the guideline to be updated. Now I have to try to remember what I actually asked for if I want to repeat the results. Treat your instructions and guides as living documents.
- Version your prototypes. This one was more frustrating than it sounds: if you’re prototyping live on a server or from your own computer, ask the AI to add a version number (like “Ver. 1.5”) and update it with every change. A couple of times, the AI fixed an issue and I didn’t see any change — because I was testing an older cached version of the prototype.
- Add debugging messages. Learn how to read debugging messages. AI can inject debug messages into each part of an interaction, providing valuable information you can copy and paste back into the chat. This was really helpful when I had issues with the 3D model interactions — it was able to add code that would output the name of the meshes in the 3D model, and I (we) discovered that some of the mesh names were incorrect.